Monday, August 26, 2013

Today's Favorite Plant - Grevillea juniperina 'Pink Lady'


I might be a little late for the Grevillea bandwagon, but I have added a few to the garden the past two years nonetheless.

My recent new love is Grevillea juniperina 'Pink Lady'. I saw it and had to have it.  She went into one of the spots where a Laurel came out a couple weeks ago.

At 3' tall and 6' wide, it will spread to fill in the flower boarder with its cream pink flowers for most of the year. It's new home is hot and sunny, slightly protected and in very well-draining soil.

Grevillea are adapted to the poorest soils, thrive on neglect, and are extremely drought tolerant which also sounds appealing for Portland's hot summers.


Friday, August 23, 2013

Time to Say Goodbye?


I love a good Hebe, but I do find a few of them to get either too ugly, too big, or too scraggly over time.

It is easy to get seduced by Hebes in 4" pots at the nursery. They are so inexpensive and cute. You never realize that some of them get so tall or that even the short ones can be 5' across. 

My current dilemma is Hebe cupressoides. I'm beginning to wonder if it is past it's prime?!? After my recent bout of Laurel removal, I'm looking at things with a little more critical eye. 

I have had terrible luck trimming Hebes back (sorry Hebe anamala - I loved you so) and I wonder if they just have a finite lifespan in the garden. Perhaps it's just the long summer getting to it?

Should it stay or should it go...???

August 2013
Hebe cupressoides looking better in early summer 2013
Is it just end of summer raggedness?
Anybody have any ideas?

Tuesday, August 20, 2013

Today's Favorite Plant - Lepechinia hastata (Pitcher Sage)

Today's favorite plant is easy to grow, heat/drought tolerant and putting on a stunning display in the dog days of summer.

The hummingbirds also love it, so that alone makes it worth planting in my book.

Lepechinia hastata is a Salvia relative that is native to Hawaii and has lovely silver colored, arrow shaped leaves, that have a minty aroma. It gets about 4 feet tall and wide.

Like most Salvias - it likes good drainage and prefers full sun.


Lepechinia hastata (Pitcher Sage) — With a big-leaf tropical look that belies its rugged hardiness, this Hawaiian native belongs to the Mint family and masquerades as a Salvia. Stiff, upright and fuzzy, the mauve-infused stems inject architectural pizzazz, while hosting large, spade-shaped felted greenery. Smoky magenta-colored, openly arranged flower spires, some 12” tall, grace the spice-scented foundation. Known to possess antibiotic properties, it delivers late season fanfare, acquiesces to dry poor soil and temperatures as low as 0°F, asking only for a well-drained abode. Zone 7 


Dried Tomatoes

What to do with the endless supply of small tomatoes I have?!?

Normally, if I have a bucket full of small tomatoes,  I would just toss them in the food processor and make salsa out of them.

I used almost the entire colander for 4 trays.
This year, I wanted to do "sun-dried" tomatoes, but that seems like a lot of work and I'm not sure I have the correct apparatus for such a project. I was imagining my beige lawn covered in wire benches with zillions of tomatoes laid out in the sunshine and me with a fly swatter swinging madly.

Several friends have dehydrators, so I'm going to give that a try and see if I can approximate the "sun-dried" part. And since I get to borrow the machine and try it out first, I can decide if a machine is worth purchasing for the future.

Nesco Dehydrator with 5-trays


I started the process at 3pm yesterday. I picked everything fresh. The tomatoes got a bath, were towel dried, had the stems removed and were cut in half or in quarters. Some of the 'Jaune Flame' were a little bigger than the 'Yellow Perfection' and the 'Stupice' so I quartered them.  It took about 45 minutes to get the trays ready to go in the dehydrator.

Halves of fresh tomatoes ready to go!
The next morning - they sure shrivel up!
Some of the bigger pieces still need more time.
I ran the machine overnight (about 15 hours total, so far). I think they still need a little more time, but I didn't want to leave it running all day while I was at work. The next time I will start it at a higher temperature for the first 24 hours.

The goal when finished is to be able to freeze some and the rest to pack in jars with olive oil with sea salt, oregano, basil and garlic.

Hopefully they will be delicious and great for pasta, pizza and anti-pasta platters.  They will make nice gifts too.


Tuesday, August 13, 2013

Today's Favorite Plant - Ligularia dentata


Ligularia dentata — Broad clusters of large golden yellow flowers midsummer. 
Glossy chocolate-maroon rounded foliage with purple undersides. 
Likes reliably moist soil and full sun with some mid-day shade. 
Imposing waterside plant. Height: 40". Zone 5.

In my garden, Ligularia dentata is my water gauge. When it's large, leathery, round, dark green leaves with purple on the bottom start to wilt at the first sign of dryness, I know it is time to water the rest of the garden too.

In August, it has many large daisy-like orange-yellow flowers with a brown center held above on purple stems.


It prefers shade and lots of moisture, but with a little extra water now and then has done well with more sun. When a rather large walnut limb got removed this spring, my Ligularia dentata found it's home a little sunnier than when it was first situated. But it has still done well since it tends to get hit with the veggie garden sprinkler.


A great plant for the back of the shady boarder. It forms a large, dramatic clump about 3-4' tall and wide. It can be a bit unruly with it's big floppy leaves and I sometimes have to rescue some of it's neighbors from beneath the leaves (I trim off the bottom most leaves).


Slugs and summer wilting seem to be the only problems.  Slug bait early and often. 

Monday, August 12, 2013

Ripping out Laurels is Hard Work!

When I first moved into my home in 2006, I was given three seedling Laurels for free. At the time they were tiny and barely took up any room in the flower boarder. It seemed like they would never reach the top of the fence.

2007
Eventually, as Laurels are want to do, they grew up and out towards the grass and made mowing the grass harder. I constantly had to trim all the new growths back so that I could get the mower and edger past them and had to trim the sides to keep them in check. It was constant maintenance. Then they got so tall that I couldn't reach the tops easily and the tops began spreading out wildly.

When I first planted them, I had this bright idea that they would eventually cover the neighbor in the duplex's windows that looked directly down into my house and yard.

2013 - Headed towards the second story of the duplex.
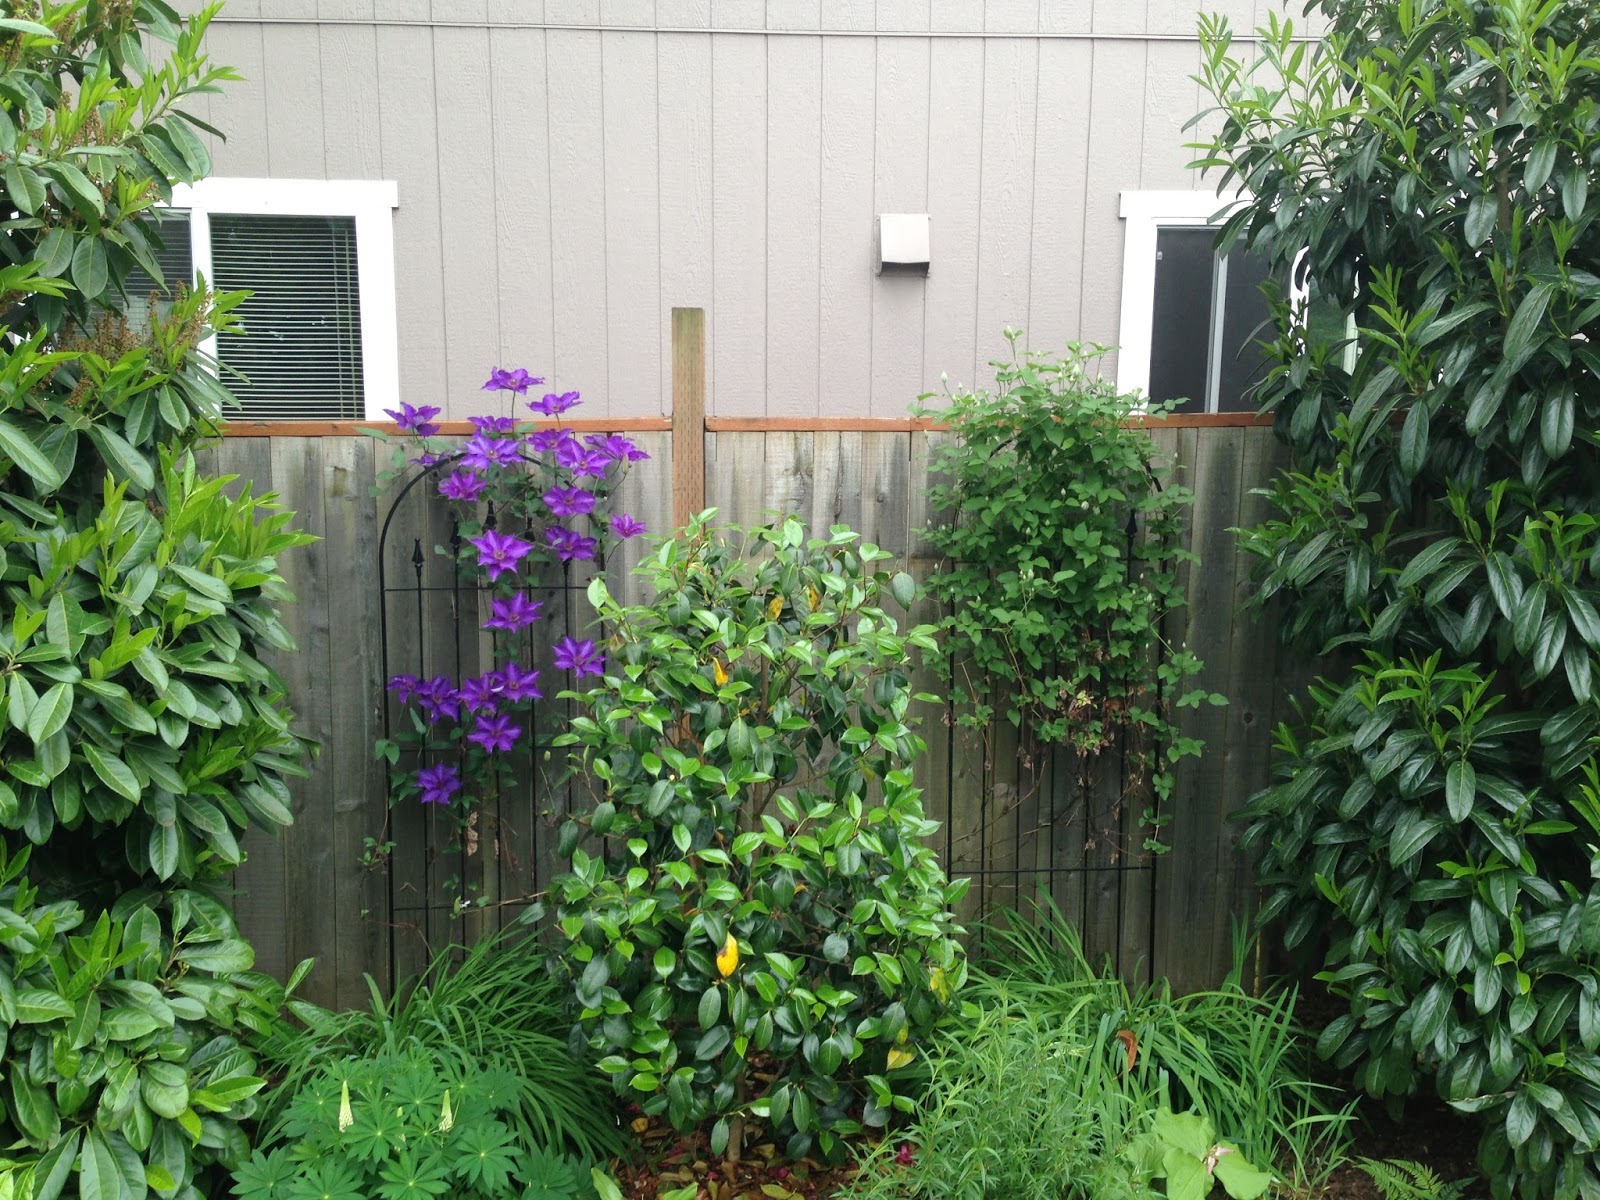
The Laurels doing their job covering the windows.
By 2013, they were reaching the second floor of the neighbors and were way out of my reach without a ladder. I began having visions of being 90 years old on a ladder, hacking Laurels back.

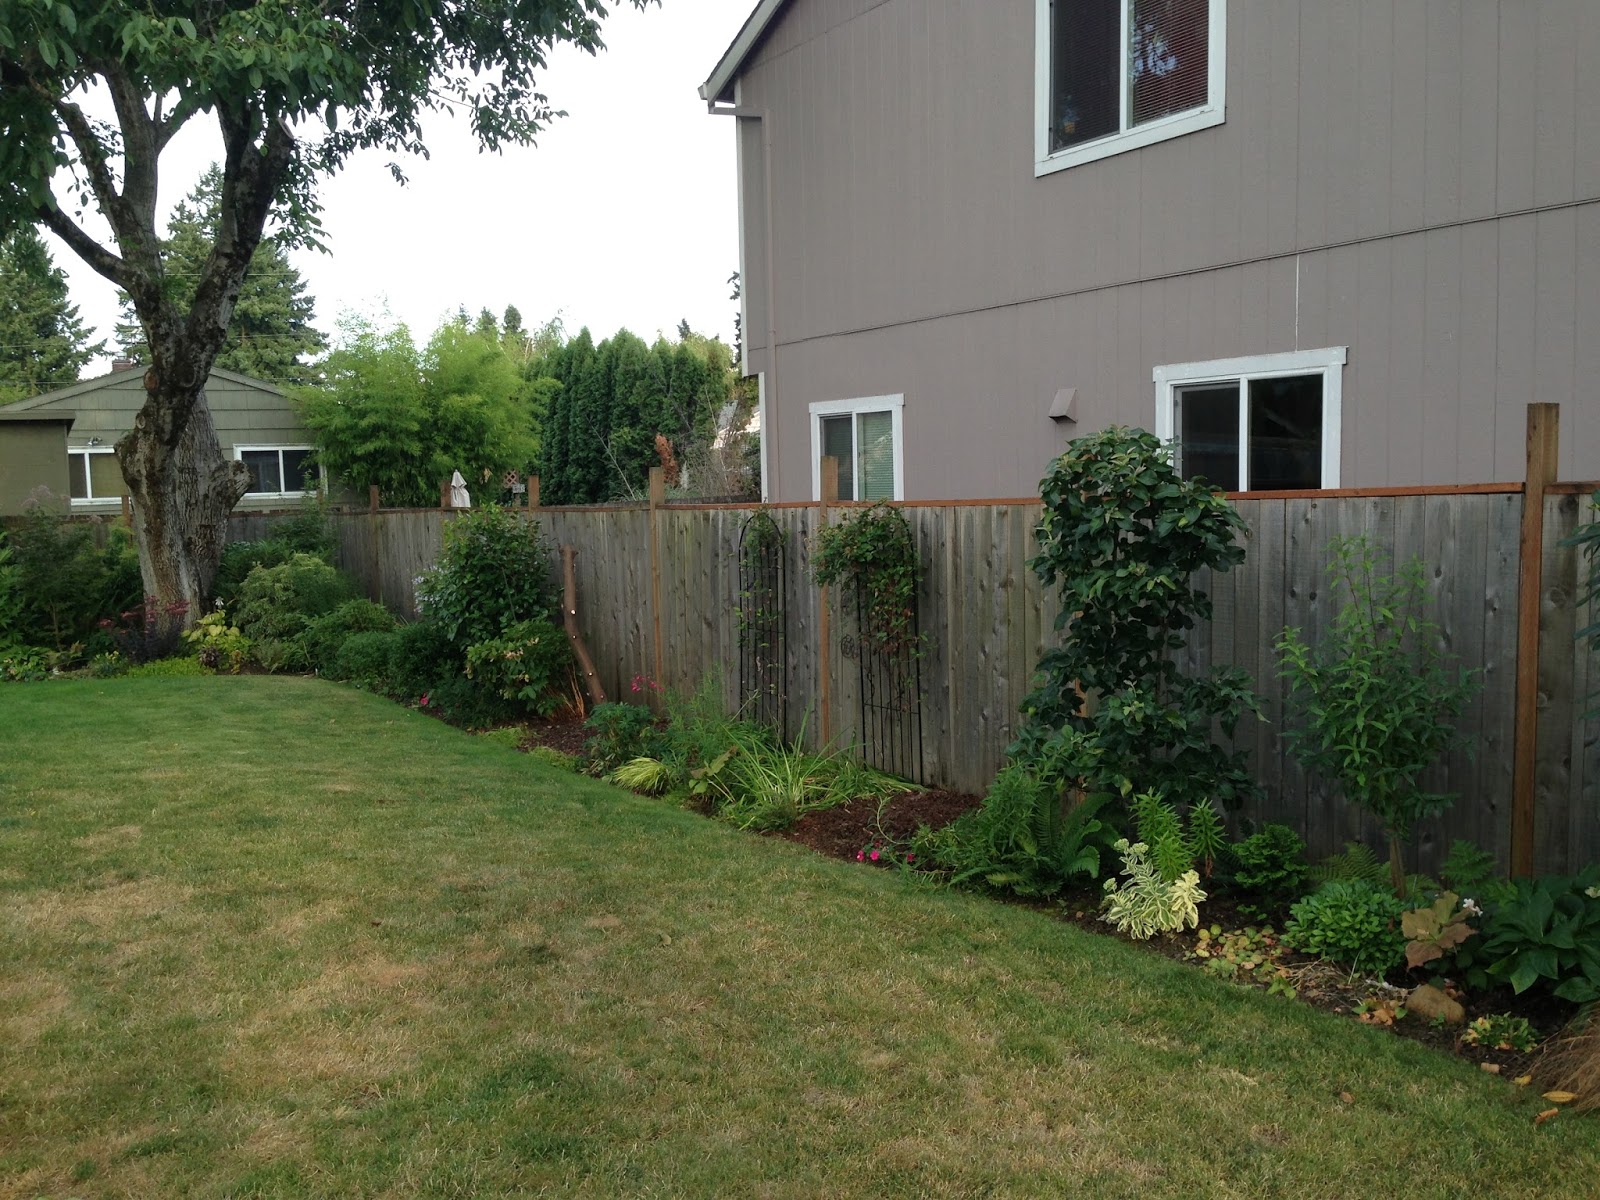
A few weeks ago, I decided it was time to take them down to the height of the fence, so out came the loppers and I gave them all a flat top. I filled up four green bins with the tops of the three shrubs. I wasn't 100% happy with the new look, but figured they were at least now easier to contain/maintain.

I hear the "boxy" look is very "in" at the moment!
Looking better - Easier to control at least!
After living with them at their new height for about two weeks, I decided to remove two of them. I was wondering through Xera one Thursday after work and there were too many cool plants I decided I could plant where my Laurels were. Rhone Street Garden was also talking about removing an old Laurel so that was my inspiration too. Out they were going to come! 

Center Laurel is gone and the trunk of the left one is still in place.
I started with removing the remaining foliage of each shrub, leaving the trunks at the fence height. Only one shrub had a single trunk, the other two had multiple smaller trunks.

The bark was raked away at the plant base. I got the shovel, hand clippers and loppers ready for action.

Wonky trunk
Beginning to dig around the trunk circumference looking for side roots.
Cutting away roots.
The folks at Xera gave me some good advice regarding root ball removal. Leaving the trunks tall was good for rocking the root mass back and forth. Rocking the trunks helped identify where roots were still anchoring the trunk. Then a little more digging with a shovel/trowel to locate more roots and then cutting them with the clippers or the loppers. The clippers seemed easier and safer for me than using an axe or a pickaxe.

Eventually, I was able to free up the root balls and pull out each of the trunks. They, fortunately for me, tended to grow out more sideways and not downwards, so after about 45 minutes per stump, they were history.

In one of the spots where a Laurel had been, I moved a Prostanthera lasianthos (Victorian Christmas Bush) that I had planted in a most inappropriate spot. When I read the plant tag initially, I thought it was 10-18 INCHES tall. Turned out at later re-reading and after I had planted it, to be 10-18 FEET tall.

Prostanthera lasianthos is marginally hardy here in Portland, so although it sailed through last winter perfectly fine and flowered this summer, it needed to be moved to a better spot if it wasn't going to croak. It may turn out to be just as much work as the Laurels, but it's much more interesting.

Vites agnus-castus 'Sensational' & Prostanthera lasianthos 
Grevillea juniperina 'Pink Lady' & Callistemon viridiflous
Paul Bonine of Xera suggested the Callistemon viridiflous and Vites agnus-castus 'Sensational'. I fell in love with Grevillea juniperina 'Pink Lady easily and with no help all all from Paul. 

I still have to come up with some new shrubs to replace the third Laurel - Any suggestions?


Thursday, August 8, 2013

Homemade Hot Pepper Sauces

Summer time is hot pepper time! 

The last few years, I have been making my own jars of hot sauce with the various hot peppers I grow. I generally grow some combination of Ghost, Thai, Scotch Bonnet, Cayenne, Kungpao, Jalapeño, Serrano and Habañero. 
Green Thai
Thai Green
Scotch Bonnets

I've grown a Bhut Jolokia (aka Ghost Pepper) as a houseplant for the past three years. At first it was just for the novelty of finding the former World's hottest pepper and being able to grow it. Turns out it also tastes amazing - a mixture of floral and citrusy notes, not to mention the hottest thing I have ever eaten (like eating lava). I see them for sale at nursery's all over the place now. 

If you're ever bored, just search YouTube for videos of people eating them whole. It's very entertaining. I don't recommend it however. A mere nibble of the sliced cap end is enough to make me hiccup for 20 minutes.
Three year old Ghost Pepper Bonsai
Even that itty-bitty red one is killer!
The following recipes are more on the "chunky" side of hot sauce, more like an applesauce consistency than liquid Tabasco. I spoon them onto food in small amounts or add to soups or pasta for a bit or a lot of zing.

Some of the recipes use cooked ingredients and some just raw.

Any of the hot pepper amounts can be adjusted if you like it less hot but still want to try a recipe. Blanching sliced peppers in boiling water also helps remove a little of the heat.

PLEASE PRACTICE SAFE PEPPER HANDLING -  BE SURE TO HANDLE HOT PEPPERS WITH EXTREME CAUTION AND WEAR GLOVES!  


Ghost Pepper Hot Sauce (Supa-Hot!)

Ingredients:
·        3 ghost peppers
·        5 cloves of garlic
·        1 whole onion
·        salt
·        dash white pepper
·        4 carrots
·        2/3 cup apple cider vinegar
·        1/3 cup water

Preparation:
In a food processor/blender, coarsely chop up the ghost peppers (handle with extreme care), onion, garlic and carrots. Add salt and white pepper to taste (plus a teaspoon of turmeric if you'd like as an additional preservative)

Add in 1/3 cup water and 2/3 cup apple cider vinegar...to your liking. Blend everything in the blender until it is smooth.

Store in fridge in a glass jar for up to a year.

This makes a thicker hot sauce - it will be like applesauce in consistency.  Spoon out this hot sauce as desired. But use with CAUTION....this can be a VERY hot

NOTE: The first time I made this, I blanched halved ghost peppers with seeds and pith removed in boiling water for 30 seconds to take a little of the heat out - it was still PLENTY hot!


Habanero Hot Sauce (Hot!)

Ingredients:
·        12 habanero peppers
·        2 carrots
·        1 large onion
·        6 cloves of garlic
·        ½ tablespoon salt
·        ¼ tablespoon white pepper
·        1 lime
·        8 tablespoons white vinegar

Preparation:
Cut peppers in half and remove seeds (handle with care). Drop in boiling water for 30 seconds. 

Remove peppers and put onion, carrots and garlic cloves into boiling water and cook until tender. Cool the veggies. 

Squeeze juice from lime and combine all ingredients and put in blender. First chop, and then blend at high speed. 

Just put in glass jar and store in fridge. Spoon out this hot sauce as desired. 


Jalapeño Hot Sauce (Medium Hot)

Ingredients:
·        12 jalapeño peppers
·        8 tablespoons red wine vinegar
·        1 whole lime, just the juice
·        1 tablespoon sugar
·        ½ tablespoon salt
·        ½ tablespoon onion powder
·        ½ tablespoon garlic powder

Preparation:
Cut peppers in half and remove seeds (handle with care). Drop in boiling water for 30 seconds. 

Squeeze juice from lime and combine hot peppers with all other ingredients in blender and whiz up. Blend on high speed to puree all ingredients together. 

Store in fridge in a canning jar or other glass container.

Three year old Habanero - I just cut them back in Spring when they get lanky.